|
Modifying railings is not always the easiest task to accomplish in Autodesk's Revit. In fact, some may think that process is more complex than customizing a curtain wall system. When combined with editing stairs, I would have to agree that a majority of my students (and professionals) have the most difficult time with this process. I will provide a series of blog posts that I hope will better explain how this process works in Revit. I will begin by explaining how to convert your typical railing into a wall-mounted solution.
The following steps describe an exit stair with two railings, one against a wall (inside) and the other freestanding. Inside railing is assigned to Railing Guardrail – Pipe style Outside railing is assigned to Railing Handrail – Pipe style Style of stair= Monolithic Stair Additional steps are required to end the handrail at wall (outside railing) with pipe extension Select outside railing and do the following: Choose EDIT TYPE Choose DUPLICATE and rename copy: Railing Handrail – Pipe Wall Extension Choose EDIT button under Baluster Placement: Make all fields under Baluster Family=NONE (see image below). Uncheck Use Baluster Per Tread On Stairs Press OK when done. 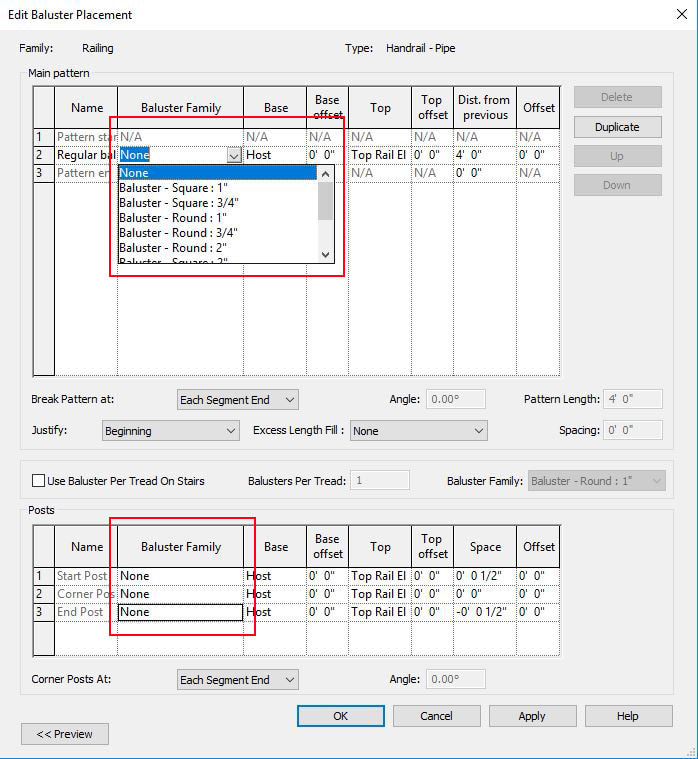
Choose EDIT button under Rail Structure and use Delete to remove all fields
Press OK when done. 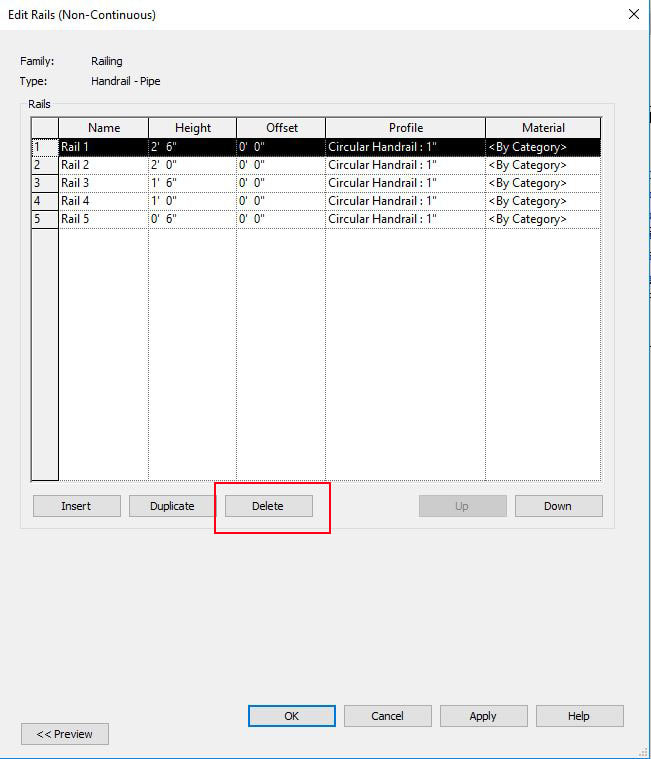
Uncheck Top Rail / Use Top Rail (see image below)
Choose button under Handrail 1 / Type option 
Choose Pipe – Wall Mount from Type menu
Press OK when finished 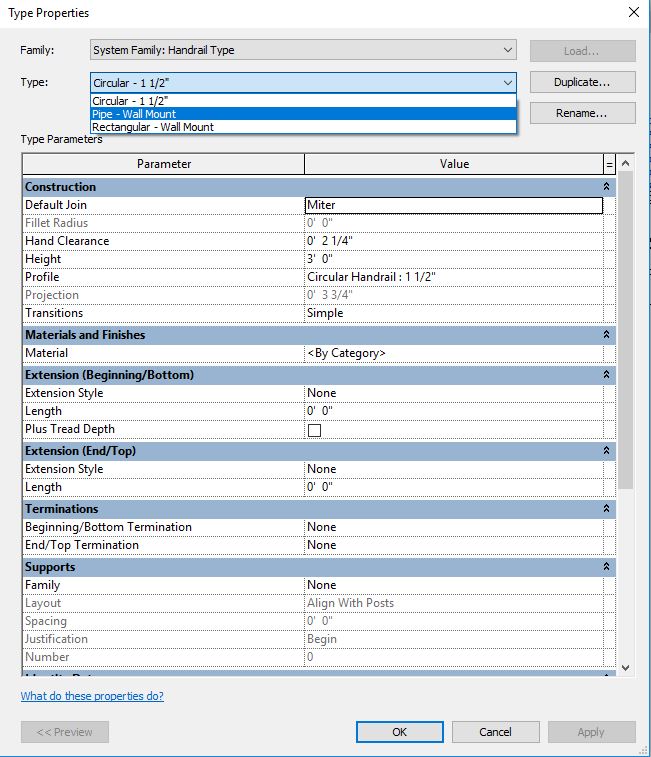
Review your 3D model and you will notice the changes made to your inside railing.
Next, you will need to create a new handrail type where the handrail extends at the bottom and top of the stairs. To do this, we will use the Families Menu. In your Project Browser (see below), find Families / Railings / Handrail Rail Type / Pipe Wall Mount and right-click, duplicate and name it “Pipe – Wall Mount Extend”. This style will return the handrail to wall at bottom/top of the stair and extend 1'-0" beyond its current locations (see final completed stair design) 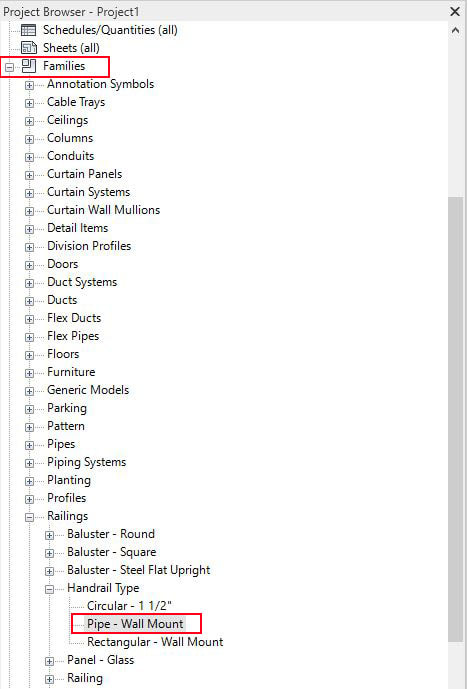
Right-click on the new Pipe – Wall Mount Extend type and choose Type Properties (see below)
Copy the Extension Style and Lengths under both Extension menu as shown in the image below. Press OK when done: 
You have now created a new type of handrail that extends 1'-0" beyond the bottom and top of the stair run but you will need to assign this design to your customized railing.
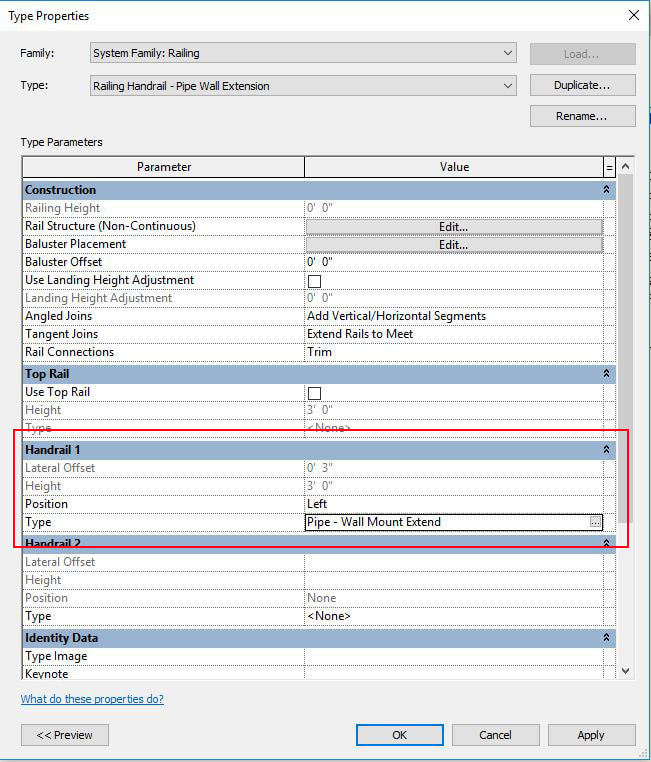
In 3D view, select the outside handrail again (Railing Handrail – Pipe Wall Extension), choose EDIT TYPE. Under the Type menu, choose the newly created handrail type: Railing Handrail – Pipe Wall Extend 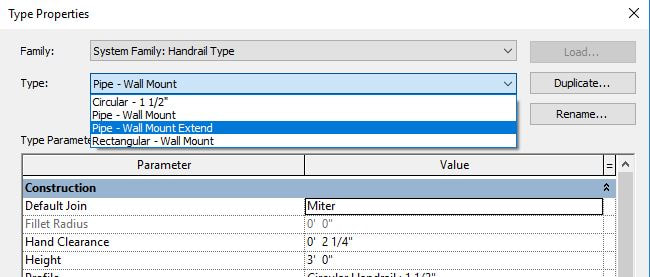
Under the Handrail 1 settings, change Position = Left and Type = Pipe-Wall Mount Extend (see image )
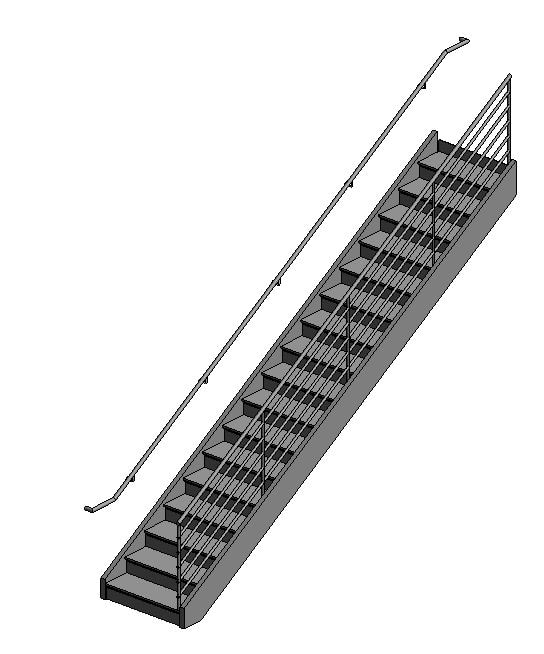
Congratulations, the stair design will now match the design (see image below)
If you have any issues following these instructions, be sure to watch my YouTube video that also explains the process.
monika
9/30/2021 10:54:03 am
So helpful! Thank you so much for this! 12/21/2021 03:23:07 pm
Last Monday night, I visited my brother, who told me about his plan to build a backyard swimming pool with a pool safety gate. He wants to hire a pool contractor, to which I offered to help him with some research. I did some looking around online, and there, I came across your very informative post. I think it's incredible how you explained that Modifying railings are not always the easiest task to accomplish in Autodesk's Revit. Some may think that process is more complex than customizing a curtain wall system. This is a good point you made here. I'm sure anyone interested in getting the pool safety gate built like my brother will be glad to have heard of it. Thank you for this! I'll be sure to share this with him shortly!
John Manfredy
12/22/2021 06:32:49 am
Jeff, thanks for your comments. I always try to simplify the process as best I can to allow users to understand complex procedures in Revit. I also have a YouTube channel if you want to learn more. 8/2/2022 06:35:04 am
I want to get some rails for a staircase in my back yard. It makes sense that I would want to get some nice railings installed for this. I'll be sure to get a professional who can help get them installed mounted on the wall. Comments are closed.
|

AuthorJohn Manfredy has over two decades of expertise teaching architectural technology to architects and interior designers. Coursework has included Autodesk products: Revit Architecture, 3D Studio Max, Autocad and SketchUp. Archives
September 2023
Categories |
 RSS Feed