REVIT FOR INTERIOR DESIGNERS
  • Home
  • LET'S BUILD THIS!
  • How it Works
  • Register
  • The Revit Resource

The Revit Resource

Revit for Interior Designers

Scope Boxes and Crop Regions: Tips and Tricks for Revit 2024 Users

8/31/2023

 
Revit 2024 is now available, but it is causing my past Revit for Interior Designers (& architecture) students to scratch their heads. 
  • What happened to the Imperial-Archtectural Template when starting a new project? 
  • What is new Imperial Multi-discipline template anyway?
  • What are these green, dashed boxes surrounding the view?
  • Why can't I deactive the Crop View option in Plan view?
Let's take this one step at a time. 

​For those that want to have Revit 2024 'look and feel' like prior releases, on the homescreen choose NEW, then the BROWSE button and choose either Commercial-Default.rte OR Residential-Default.rte depending on what type of project you would like to begin.
Picture

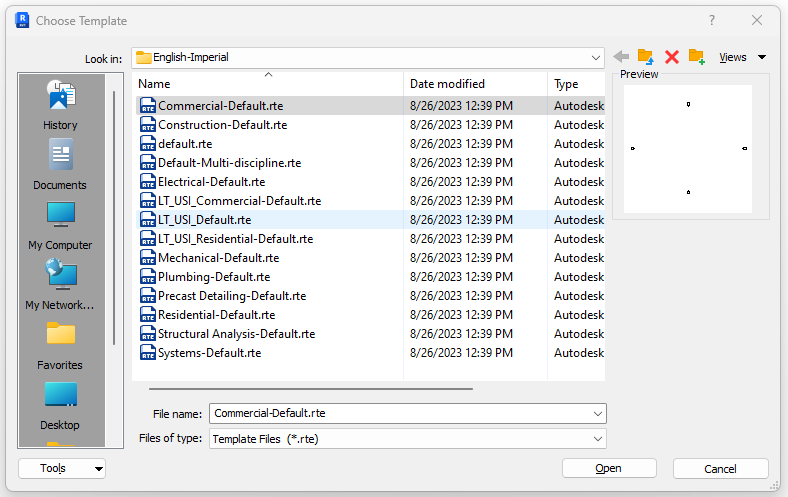
​You will notice that although the screen looks the same, the Project Browser has been updated with new floor plans that appear in each elevation view.   In addition, schedules and sheet have been added as well.
Picture

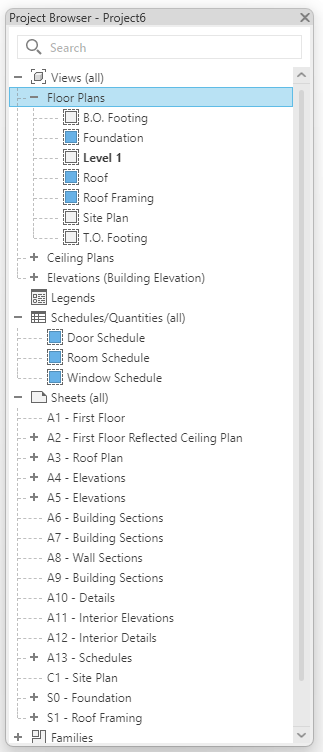
​However, I do believe there is value at least understanding what the Multi-discipline template has to offer and understand how to manipulate what appears on the screen.  In fact, it may be a good idea to add some of these techniques to your projects in prior releases of Revit.  

The first task is to understand the concept of Crop Regions and Scope Boxes.  Understanding these concepts will allow you to quickly use the new Multi-discipline template OR deploy these tactics in any Revit project.  Let's start by defining what a Crop Region does.  
​
The crop region command in Revit allows you to define the boundaries for a view. It is a rectangular area that can be drawn in any graphical project view. Once a crop region is created, it can be used to crop the view to its extents, or to control the visibility of elements in the view.
To create a crop region, follow these steps:
  1. Open any view.
  2. In the Properties panel, click Crop Region and Crop Region Visible.
  3. Crop Region activates the cropping
  4. Crop Region Visible determines whether or not you see the box that can crop the drawing
The crop region will be created and displayed in the view. You can resize or rotate the crop region by dragging the handles.

When Crop Region is activated, the elements within the boundaries of the Crop Region will be visible in the view, while the other elements will be hidden.
​
Here are some additional things to know about crop regions:
  • Crop regions can be created in any graphical project view, but they are only visible in that view and in 3D views.
  • Crop regions can be assigned to multiple views.
  • Crop regions can be resized and rotated (although I would avoid rotating the crop regions).
  • The visibility of elements in a view can be controlled based on a crop region.
  • Crop regions can be deleted.

Watch this video on the topic of using Crop Regions in Revit:

Next, lets discuss what a Scope Box can do for you in all versions of Revit
​
​A scope box is a Revit element that allows you to define the extents of a view. It is a rectangular area that can be drawn in any plan view. Once a scope box is created, it can be used to crop the view to its extents, or to control the visibility of elements in the view.
To create a scope box, follow these steps:
  1. Go to the View tab.
  2. In the Create panel, click Scope Box (make sure you are in a PLAN view)
  3. On the Options Bar, enter a name for the scope box and specify a height, if desired.
  4. Click in the upper left corner of the area you want to define as the scope box.
  5. Drag the cursor to the lower right corner of the area.
  6. Release the mouse button.
Scope boxes can be a useful tool for controlling the extents and visibility of views in Revit. They can be used to create consistent views of a project, or to focus on specific areas of a view.
Here are some additional things to know about scope boxes:
  • Scope boxes can be created in any plan view, but they are only visible in that view and in 3D views.
  • Scope boxes can be assigned to multiple views.
  • Scope boxes can be rotated and resized.
  • The visibility of elements in a view can be controlled based on a scope box.
  • Scope boxes cannot be uncropped.

Watch this video on the topic of using Scope Boxes in Revit:

Now that we understand the basics, how do we use both Crop Regions and Scope Boxes together to control the appearance of your Revit views.  This final video combines both concepts and allows you to customize the initial Multi-discipline template in Revit 2024 to start a project.

​Enjoy!!!

Comments are closed.
    Picture

    Author

    John Manfredy has over two decades of expertise teaching architectural technology to architects and interior designers.  Coursework has included Autodesk products:  Revit Architecture, 3D Studio Max, Autocad and SketchUp.  

    Read his recommendations on Linkedin to learn more about his desire to help design professionals succeed in their careers.  He is seen as a mentor who pushes you to your potential. He'll engage you in his class with his infectious passion for design technology as well as collaborative approach.

    Find John in the Facebook Group Page:  Revit for Interior Designers
    or YouTube channel:
    ​http://bit.ly/youTubeRevit  

    Archives

    September 2023
    August 2023
    June 2023
    July 2020
    May 2020
    November 2018
    October 2018
    January 2018
    December 2017

    Categories

    All

    RSS Feed

Powered by Create your own unique website with customizable templates.
  • Home
  • LET'S BUILD THIS!
  • How it Works
  • Register
  • The Revit Resource